 TIGERFASTENERS
Safety Wire Is Not a Means of Maintaining Torque, and Sometimes It Is Meant to Break
Every few months a photograph of somebody’s safety wire appears on an aircraft maintenance forum with the caption rate my safety wire, and collects several hundred upvotes and a hundred comments arguing about it. One of those threads ran to six hundred and thirty nine points. The comments are about neatness. The document that governs the job is about something else entirely, and it says so in its first paragraph.
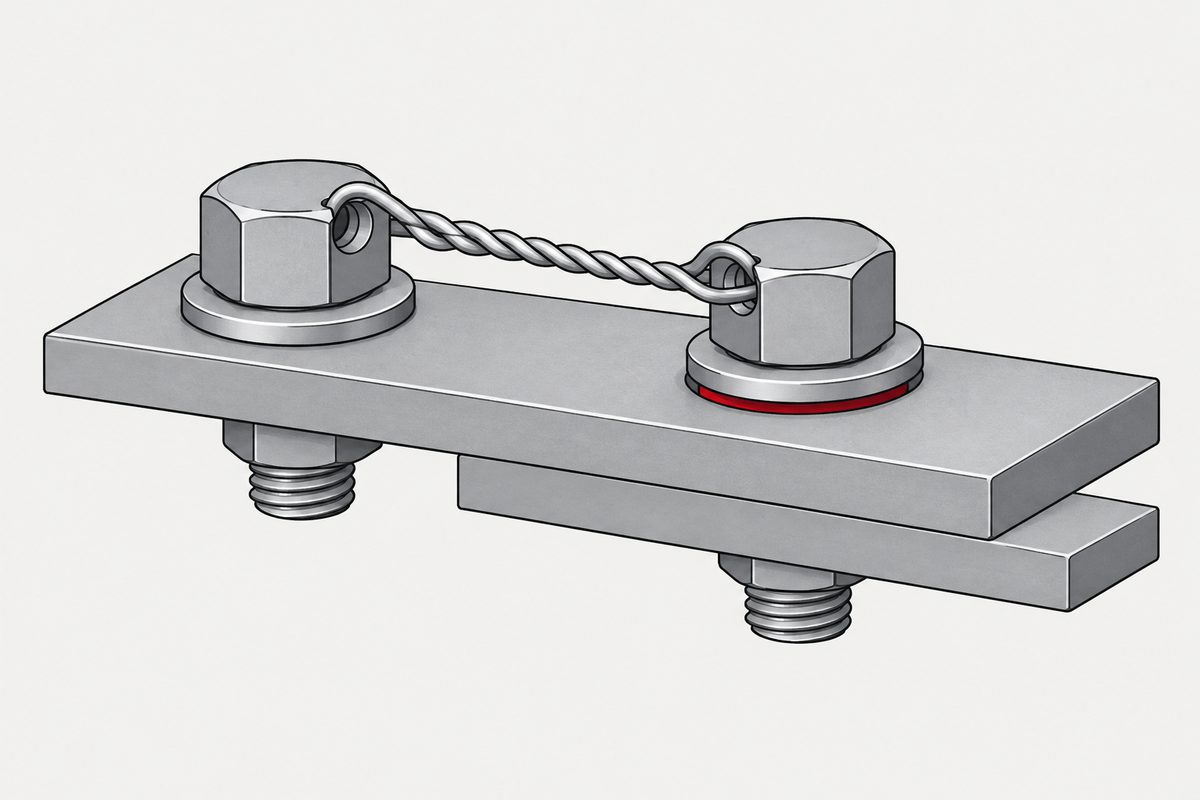
“These practices are not a means of obtaining or maintaining torque, rather a safety device to prevent the disengagement of screws, nuts, bolts, snap rings, oil caps, drain cocks, valves, and parts.” That is the opening of the safetying section, and it settles what the wire is for. It is not holding the bolt tight. It is stopping the bolt from leaving.
The document is an aircraft maintenance document. FAA advisory circular AC 43.13-1B, six hundred and forty six pages, free to download in full. It is not a rule for cars, machinery or buildings. We used a different chapter of it on locknut reuse; this page is about paragraphs 7-122 to 7-126, which are a different subject in the same book.
One thing the circular does not do, anywhere, is approve a method. Its own first paragraph makes its contents acceptable only when the manufacturer is silent, which is why the phrase aviation approved does not mean what people use it to mean.
We are not rating anybody’s safety wire. We have not seen those parts, we do not judge workmanship, and there is no advice here about how to make a neater twist. What follows is what the document requires and, more interestingly, what it says the wire is not.
Three methods, and the wire is only one of them
The same paragraph names the family: “Three basic methods are used in safetying; safety-wire, cotter pins, and self-locking nuts.” Retainer washers and pal nuts get a mention as sometimes used. Each has a place, and the paragraph assigns them.
- Wire, either soft brass or steel, on cylinder studs, control cable turnbuckles and engine accessory attaching bolts
- Cotter pins on aircraft and engine controls, landing gear and tailwheel assemblies, or any other point where a turning or actuating movement takes place
- Self-locking nuts where they will not be removed often, because “repeated removal and installation will cause the self-locking nut to lose its locking feature”
- Pal or speed nuts, which “should never be reused”
The wire is for things that turn against a thread and back out. The pin is for things that turn or actuate. The nut is for joints that stay assembled. The choice is a statement about what the joint does, not about which device is strongest.
One line in the wiring procedures makes the same point from the other side. “Drilled boltheads and screws need not be safety wired if installed with self-locking nuts.” A drilled head is not an instruction to wire it. It is an option that another device can discharge.
Where the wire is supposed to break
This is the part that inverts the usual intuition, and it has a whole clause.
7-123: “Do not use stainless steel, monel, carbon steel, or aluminum alloy safety wire to secure emergency mechanisms such as switch handles, guards covering handles used on exits, fire extinguishers, first-aid kits, portable fire extinguishers, emergency valves, or oxygen regulators.”
And from the paragraph before it: “Where successful emergency operation of this equipment is dependent on shearing or breaking of the safety wire, particular care should be used to ensure that safetying does not prevent emergency operation.”
On an emergency handle the strong wires are the forbidden ones. What is specified instead is brass or soft copper shear safety wire, and the reason is given in one sentence: “a secure seal indicates that the component has not been opened”. The wire is not a lock. It is a tell-tale, and it has to give way to a hand in a hurry.
The sizes for that job are separate too: copper wire at .020 inch diameter, aluminium wire at .031 inch, used as seals on first-aid kits, portable fire extinguishers, emergency valves and oxygen regulators. Between the two lists there is also a warning that reads as though it was written after an incident: “Care should be taken not to confuse steel with aluminum wire.”
Two methods and a band where both are allowed
For everything that is not an emergency device, the document gives two methods and sizes them.
- The double-twist method, described as the one most commonly used
- The single-wire method, for screws, bolts or nuts in a closely-spaced or closed-geometrical pattern such as a triangle, square, rectangle or circle, and also permitted on parts in electrical systems and in places that are difficult to reach
The sizes are where it gets specific. For the double-twist method, .032 inch minimum diameter wire on parts with a hole diameter larger than .045 inch. Then an alternative: .020 inch wire in double strand may be used on parts with a nominal hole diameter between .045 and .062 inch, with a spacing between parts of less than 2 inches. For the single-wire method, the largest size wire the hole will accommodate.
Set those two side by side and there is an overlap, which is our observation rather than the document’s. The band from .045 to .062 inch of hole diameter is covered by both rules, seventeen thousandths of an inch wide, and in that band the finer wire is allowed only if the parts are closer together than two inches. Outside it, above .062, only the thicker rule remains.
Tight, but not tight
The tension requirement is four sentences that pull against each other, and reading them together is the whole skill.
“Safety wire must be tight after installation.”
“Safety wire must never be overstressed. Safety wire will break under vibrations if twisted too tightly. Safety wire must be pulled taut when being twisted, and maintain a light tension when secured.”
Tight after installation, never overstressed, pulled taut while twisting, light tension once secured. Four instructions bounding a narrow band, and the failure at each end is named: too loose and the part backs out, too tight and the wire itself breaks under vibration. Paragraph 7-125 adds the same warning about the tool: “Excessive twisting of the wire will weaken the wire.”
The finishing requirement carries a small arithmetic curiosity. When cutting off the ends, leave at least four to six complete turns, 1/2 to 5/8 inch long, after the loop. Those two limits do not describe the same twist rate. Six turns in half an inch is about 0,083 inch per turn; four turns in five eighths is about 0,156. That is a factor of nearly two between the loosest and tightest readings of one sentence, which is our arithmetic and not a point the document makes. The clause bounds the result two ways and lets them overlap in the middle.
The rest of the finishing is about what the wire does to people and parts. Ends bent under and inward toward the part, to avoid sharp or projecting ends. The loop fitting closely to the contour of the unit. The wire not nicked, kinked or mutilated. And twice, in two different clauses: never twist the wire ends off with pliers, cut it close to the hole instead.
Never torque a bolt to make the holes line up
The rule that costs the most to learn the hard way is about what to do when the drilled holes do not point at each other.
“Never overtorque or loosen to obtain proper alignment of the holes. It should be possible to align the wiring holes when the bolts are torqued within the specified limits. Washers may be used to establish proper alignment. However, if it is impossible to obtain a proper alignment of the holes without undertorquing or overtorquing, try another bolt which will permit proper alignment within the specified torque limits.”
And two paragraphs later, as a standalone note: “Do not loosen or tighten properly tightened nuts to align safety-wire holes.” The document says it twice, and gives two remedies that are not torque: change the washer, or change the bolt.
For a castellated nut being secured with wire there is a third move, and it is a direction rather than a value: tighten the nut to the low side of the selected torque range unless otherwise specified, and if necessary continue tightening until a slot lines up with the hole. Start low, so that the room you have left to move is inside the range rather than above it.
One more direction, from the caption to the worked examples: the wire “should always be applied so that tension is in the tightening direction”. Which is the whole idea again. The wire is not resisting the bolt turning. It is arranged so that if one part tries to back off, it is pulling the other one tighter.
What to take from it
- Safetying is not a means of obtaining or maintaining torque. It is a device to prevent disengagement, and the document says so before it says anything else
- Three basic methods: safety wire, cotter pins, self-locking nuts, each assigned to a different kind of joint
- A drilled head is not an instruction. Drilled boltheads need not be wired if installed with self-locking nuts
- On emergency mechanisms the strong wires are forbidden. Brass or soft copper shear wire is used instead, and the seal must not prevent emergency operation
- Wire sizes are set by hole diameter, with an overlapping band from .045 to .062 inch where a finer double strand is allowed if the parts are under two inches apart
- Tight, never overstressed, pulled taut, light tension. Four instructions bounding one narrow band, with a named failure at each end
- Never torque to align the holes. Change the washer or change the bolt, and the document says it twice
- Tension in the tightening direction. If one part backs off, it should be pulling the other one tight
The forum genre asks whether a twist looks right. The document never mentions how it looks. It asks whether the part can come out, whether the wire will survive the vibration, and whether somebody in a hurry can still open the thing it is wrapped around.
One reason that rule has to exist: the dimensional standard for the hole does not locate it along the fastener, and puts a tolerance on the position that widens with the product grade.
This is not one of the six steps. It shows up across them, or after assembly. Where the decisions that lead here were made is in specifying a screw, which sets out the order and why doing it out of order is rework.
Common questions
Does safety wire hold a bolt tight?
No, and the document is explicit about it. Paragraph 7-122 says these practices are not a means of obtaining or maintaining torque, but a safety device to prevent the disengagement of screws, nuts, bolts, snap rings, oil caps, drain cocks, valves and parts. The torque comes from the tightening; the wire stops the part leaving.
What are the three basic safetying methods?
Safety wire, cotter pins and self-locking nuts, with retainer washers and pal nuts mentioned as sometimes used. Wire goes on cylinder studs, turnbuckles and engine accessory bolts; cotter pins where a turning or actuating movement takes place; self-locking nuts where the joint will not be taken apart often.
Why are some safety wires deliberately weak?
Because on an emergency mechanism the wire is a seal rather than a lock. Clause 7-123 forbids stainless steel, monel, carbon steel and aluminium alloy wire on emergency mechanisms, and brass or soft copper shear safety wire is used instead. The preceding paragraph says safetying must not prevent emergency operation where that operation depends on the wire shearing.
What diameter of safety wire should be used?
For the double-twist method, .032 inch minimum on parts with a hole diameter larger than .045 inch. Wire of .020 inch in double strand may be used on parts with a nominal hole diameter between .045 and .062 inch where the spacing between parts is less than 2 inches. For the single-wire method, the largest size the hole will take. Copper at .020 and aluminium at .031 are used as seals.
How tight should safety wire be twisted?
The document bounds it from both sides: tight after installation, never overstressed, pulled taut while being twisted, and maintaining a light tension once secured. It warns that wire twisted too tightly will break under vibration, and that excessive twisting with a tool weakens the wire.
How much twist should be left after the loop?
At least four to six complete turns, described as 1/2 to 5/8 inch long, after the loop. By our arithmetic those two limits do not imply a single twist rate: six turns in half an inch is about 0,083 inch per turn and four turns in five eighths is about 0,156, so the clause bounds the result in two ways rather than specifying a pitch.
What if the safety wire holes do not line up?
Not torque. The document says never overtorque or loosen to obtain alignment, that it should be possible to align the holes with the bolts torqued within the specified limits, that washers may be used, and that if alignment is still impossible you should try another bolt. A separate note repeats that properly tightened nuts are not to be loosened or tightened to align safety-wire holes.
Which way should the wire be twisted?
The document gives the principle rather than a single rule: the wire should always be applied so that tension is in the tightening direction, so that a part trying to back off pulls the other one tighter. Its worked examples show the direction changing between cases, and this page does not reproduce those figures.
Does this apply outside aviation?
Not as a rule. AC 43.13-1B is an FAA advisory circular for aircraft inspection and repair, and nothing here should be applied to a car, a machine or a building. It is quoted because it is free to read in full and because it states plainly what a locking device is and is not for.
References
- FAA AC 43.13-1B, Acceptable Methods, Techniques, and Practices, Aircraft Inspection and Repair, with Change 1. Complete, free, 646 pages. Paragraphs 7-122 to 7-126 and the caption to figure 7-5
- r/aviationmaintenance, where photographs captioned rate my safety wire appear regularly and collect hundreds of upvotes
AC 43.13-1B was downloaded in full from the FAA and read for the paragraphs cited. It is an aircraft inspection and repair document and is not a rule for cars, machinery, buildings or anything else. This site used a different chapter of the same circular for the article on locknut reuse; the subject here is the safetying section, paragraphs 7-122 to 7-126, and nothing from that earlier page is repeated. We rate nobody’s safety wire. We have not seen the parts in any forum photograph, we make no judgement about workmanship, and there is no technique advice on this page. No airline is named. The following are our own arithmetic or observation, not statements by the document: that the wire size rules overlap on a band of seventeen thousandths of an inch of hole diameter between .045 and .062 where the finer double strand is conditional on spacing; that the requirement to leave four to six complete turns of 1/2 to 5/8 inch does not imply a single twist rate, the two limits differing by a factor of nearly two; and that the four tension instructions bound one narrow band with a named failure at each end. Table 7-8, the turnbuckle safetying guide, is not quoted and turnbuckles are not discussed here. The worked examples in figures 7-5 through 7-5b are not reproduced; only the caption sentence about the direction of tension is quoted. The AN, MS and NAS part specifications this circular cites have not been read. We read the forum posts and not their replies.
Enquiries
If a joint on your drawing is going to be wired, drilled heads have to be on the order before the parts are made, not decided at assembly. Tell us which fasteners need drilling and in which head, because a drilled head is a different part number rather than an operation somebody can add later.
Request a quotation
Tell us the part and the quantity. We will come back on feasibility, lead time and price.
Or email us directly sales@tigerfasteners.com